
How to Draw Curly Hair
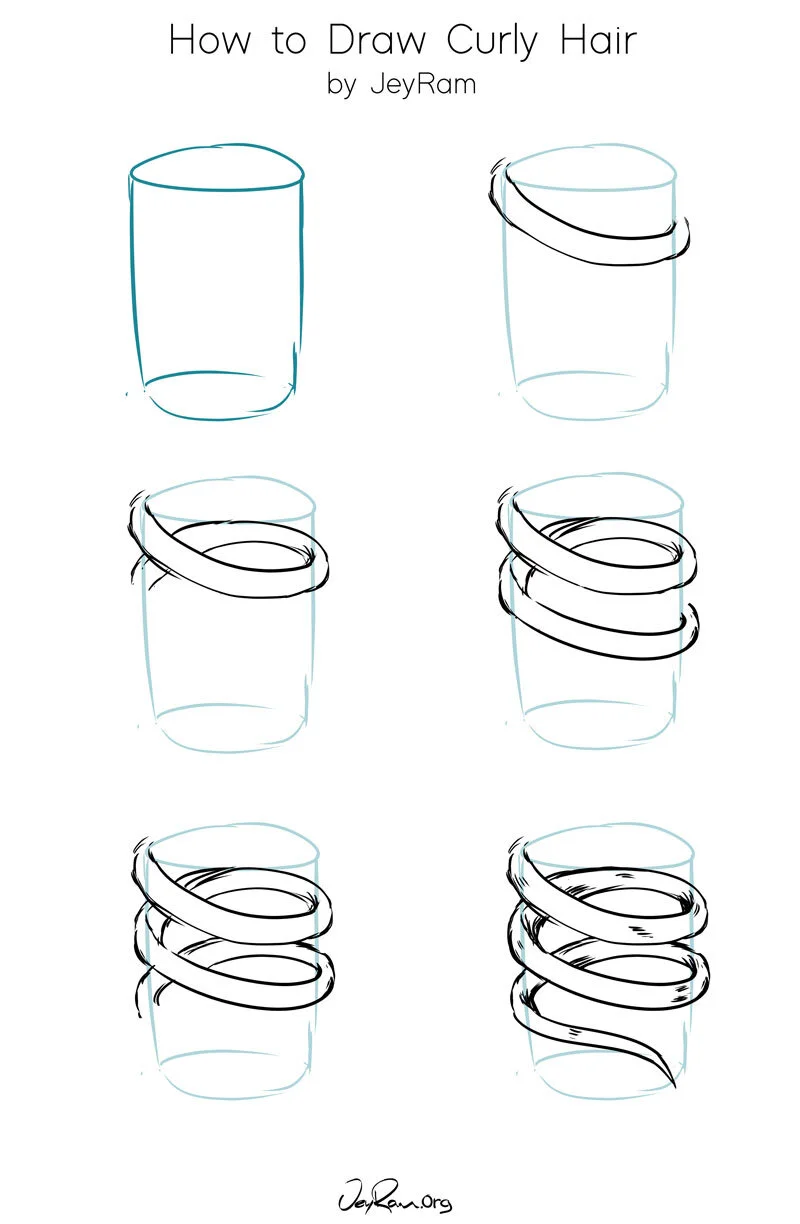
Cylinder Exercise
Doing this exercise will help you get a better sense of how to draw curls that have dimension!
Step 1. Cylinder
Draw a cylinder that will work as our guideline, you can use a different color pencil or just draw this portion in lightly.
Step 2. Front
Starting in the top left draw two lines that curve around the outside form of the cylinder, the hair ends on the right side slightly below the top. Make sure to use the example image to help you see the steps.
Step 3. Back Portion
Continuing from the last step, draw the hair curving around the backside of the cylinder and then ending towards the left.
Pay attention to how the hair is behind the first part that we drew so the previous lines will overlap the current lines.
Step 4. Second Curl
Repeat the first step of drawing hair that curls over the front, use a similar angle to the first curl so that they are evenly spaced.
Note how in the example you can see the right side curling around the cylinder.
Step 5. Backside
Repeat the third step and draw a curl that goes behind the cylinder once more.
Step 6. Tip
Finish off the exercise by drawing the end of the hair that meets at a tip
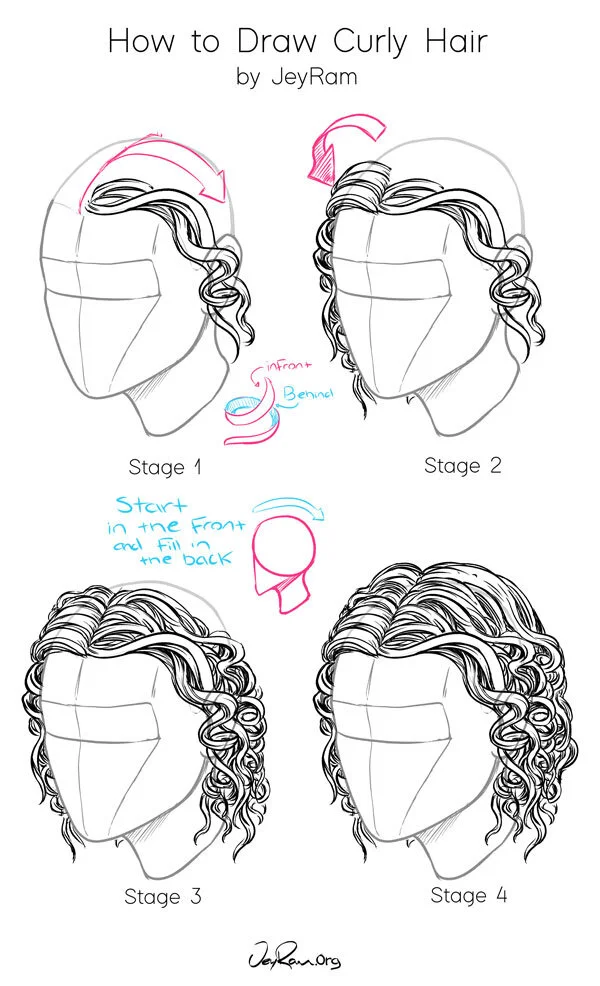
Hair on the Head
Step 1. Head shape
Start by drawing ahead, I won’t be going over the steps of drawing the head shape but I have a tutorial here that you can check out if you want help with this step
Step 2. Direction
Draw guidelines or arrows indicating the flow of the hair. You can do this step in your mind and not draw it down if you have some experience drawing hair but I always try to at least put down some light lines.
Step 3. Strands
Start adding strands of hair, as you see in the example I usually start around the ear region and build up from there. Use a lot of S curves to give you a sense of the curling hairs.
Keep adding more strands and fill out the guidelines if you drew some. Make sure to add some loose strands to help the hair feel organic.
Step 4. Rendering
Add rendering to the hair, if you want more help with this stage feel free to grab the Hair Drawing Basics course below! ^.^
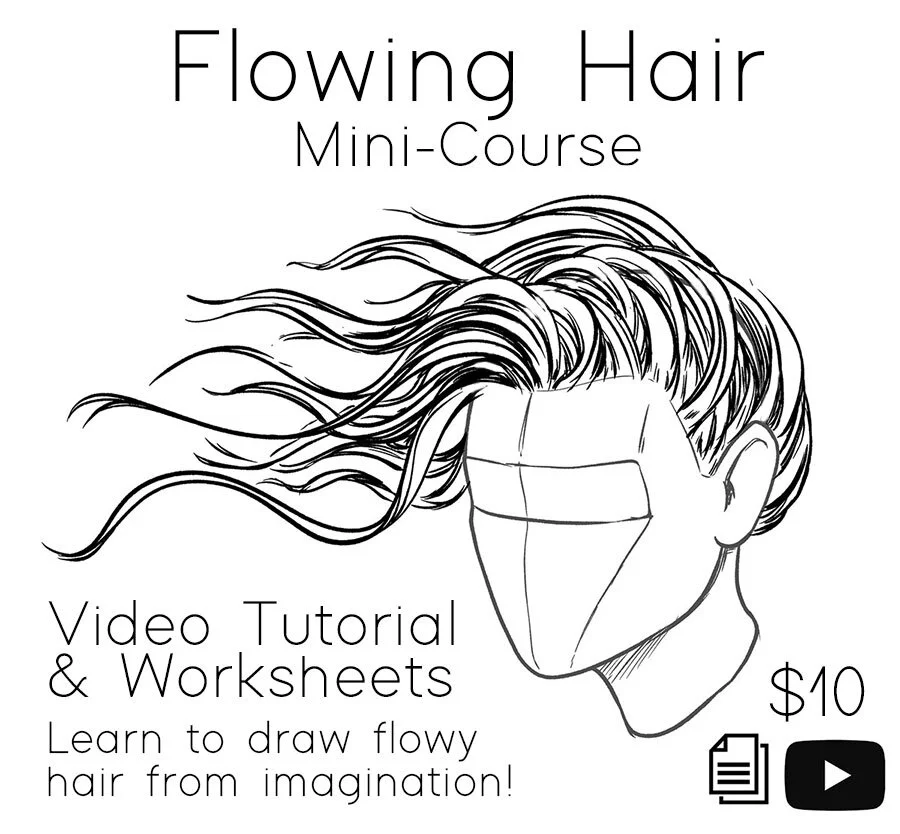
This mini course is designed to help you learn how to draw flowing hair from imagination. We go through a series of drawing exercises to help you develop your drawing skills so that you will be able to draw hair with ease. The worksheets provide a very clear and concise way of practicing that will get you fast results. Let’s draw some flowy hair together!

Learn how to draw hair with this 14-page workbook that will walk you through the stages of understanding how to draw any hairstyles.
Learning to draw can be frustrating and intimidating but with these worksheets, you will have a clear path forward and exercises to help you take things one step at a time!
This workbook is also included in the Fundamentals Bundle that you can grab here if you are interested in getting the whole collection!

In this 24 page workbook we will practice drawing 23 different hairstyles at 6 different angles each (total of 138 heads), I have found that this method of practice is great for developing the skills necessary to draw a variety of hairstyles :D
This is also a great drawing activity that is low pressure and straight forwards, it is much easier to draw with direct reference in front of you so its a good way to relax and have some fun drawing!
This workbook is also included in the Fundamentals Bundle that you can grab here if you are interested in getting the whole collection at a discount!
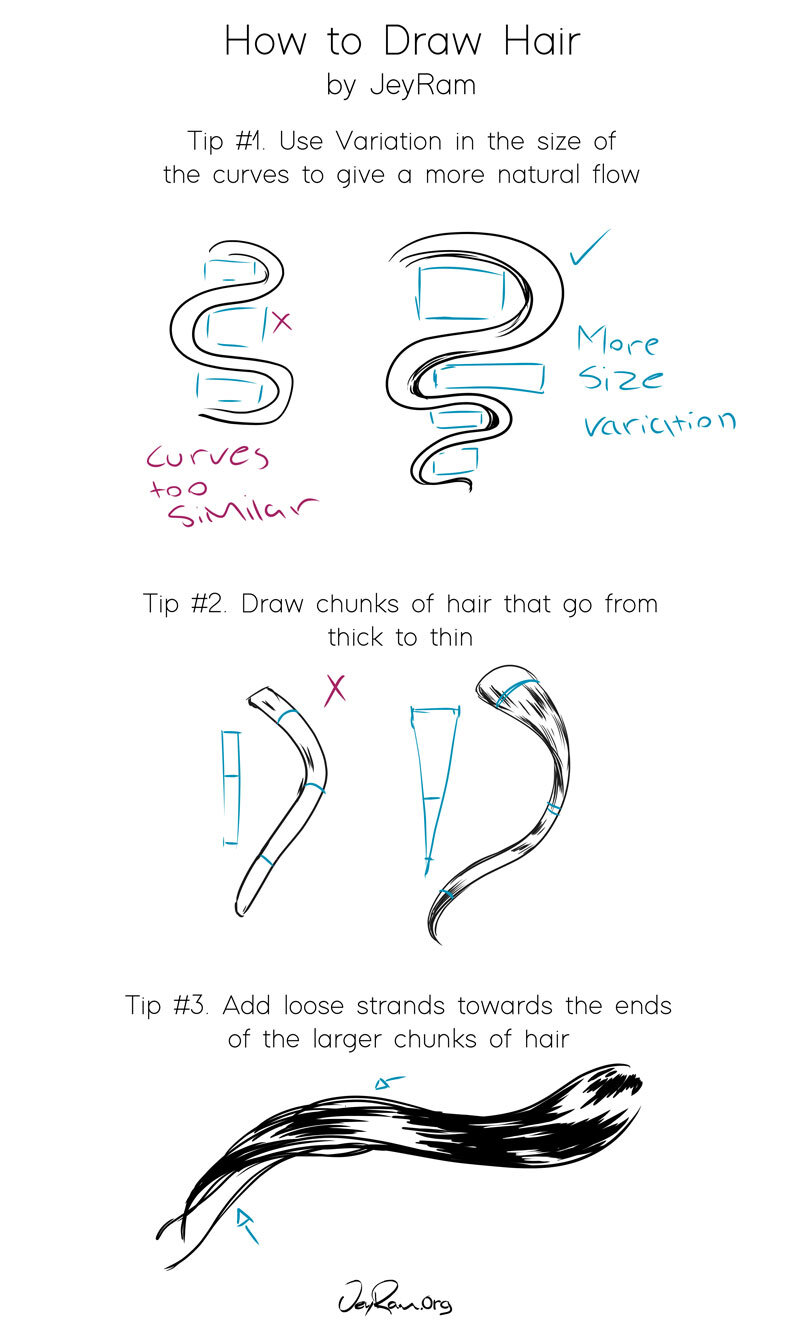
Hair Drawing Tips
Tip #1. Curve Variation
When drawing hair I recommend using variations in the curves of the hair to give it a more natural feeling. I tend to keep the curves larger towards the top (closer to the roots) and then smaller as the hair thins out. This happens because the hair tends to have more strands towards the base so there is more hair that needs to bend to create the initial curves.
Tip #2. Thick to Thin
Draw the chunks of hair thicker towards the base and then thinner towards the ends. This is just the result of how hair grows. Make sure to give your hair some volume by using these 3D forms.
Tip #3. Loose Strands
Once you have your large forms in place, add some loose strands of hair towards the end of the hair to give the hair more elegance. You can also add loose strands towards point of interest like hair ties and close to the ears.
I would recommend writing these 3 points down and then practicing them individually until they become second nature. If you look at your favorite portrait drawings with beautiful hair, you are likely to find that the artist has utilized these methods. There are obviously exceptions to these, but for most hairstyles, this works.