


0
items
$0
How to Draw the Head for Beginners
In this step by step tutorial we will gradually develop the skills to draw the head from imagination. The worksheets below and the video tutorial will walk you through each step with exercises to make sure that we actually learn how to draw. Using this method of learning makes drawing a lot easier and quicker to learn.
I also have a video tutorial that walks you through these worksheets below, and below that you can find the step by step for drawing a head that is looking to the side.
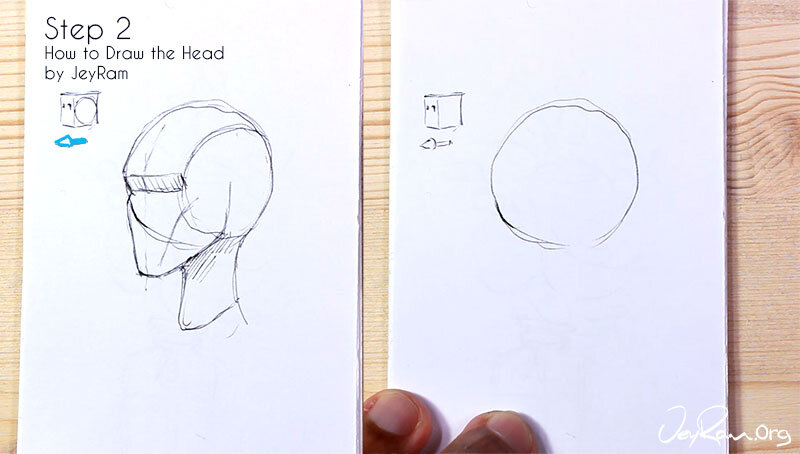
Step 1. Sphere
The first step in drawing the head using the Loomis Method (which is the one that is most widely used because of its effectiveness) is drawing a sphere.Learning to draw spheres is an important step in learning to draw in dimension because it is one of the main forms used to simplify any complex object. If you want to practice the basic forms you can check out the tutorial here (Open in a new window)
There will be a huge temptation to skip this step in the process because it is difficult and not very satisfying. The sphere might not seem that exciting to draw at first but once you start to see how powerful it is to understand these basic forms you will begin to appreciate a deeper study of it.
On page 1 of the free worksheet we go over some spheres and cut divisions into it to help understand the 3 dimension of it. Doing these studies regularly will be immensely helpful across any form driven drawing.
Notice the light lines in the first 3 rows on spheres and how they describe the backside of the sphere, this is important to understand so when we don’t think of these as flat circles. Learning to create 3 dimension of a flat piece of paper is the most difficult part of drawing but also the most satisfying. Take your time with this practice
Step 2. Pick Direction
Decide which direction the head is facing, I have drawn an arrow and a small box that represents the orientation of the head we are drawing. I recommend you get into the habit of drawing a box to represent the head as you practice because it will inform the next steps and make it easier to understand how you can draw heads at different angles.
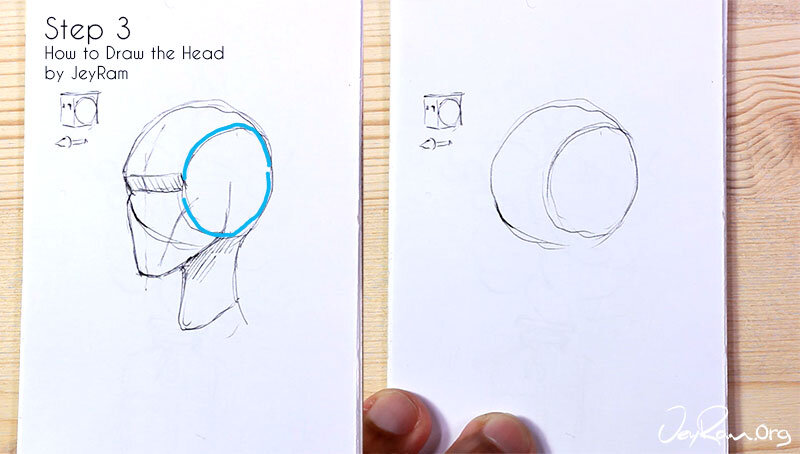
Step 3. Side Plane
On the box that shows the direction of the head you can see I have drawn a small circle. This circle represents the side plane of the head, since the head isnt perfectly spherical we want to shave the sides; think of the area where the ears go and how its much flatter than the front of the face.
Draw a circle onto the sphere like the diagram below. This stuff might feel intimidating and confusing at first, but I am trying to explain as much as possible about the process upfront so it will make more sense down the road. This will take some time to sink in, dont worry if it doesnt make sense at first!
On page 2 of the free worksheets we practice this step many times because its one of the most important steps because it defines the rest of the structure.
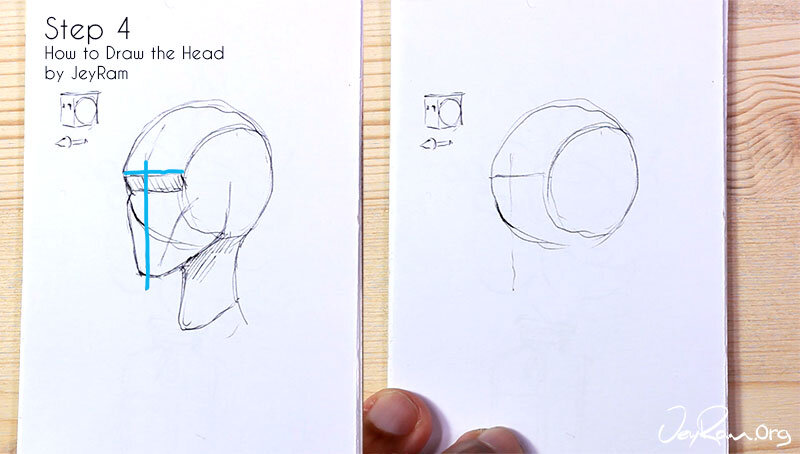
Step 4. Brow Line and Center Line
Add the brow line (this is where the eyebrows would go and the eyes would fall underneath this line) and the center line of the face. Notice how the center line in my drawing is a bit further to the left because we are seeing the face in perspective. Extend the center line downwards from the sphere so we can add the jaw using this line.
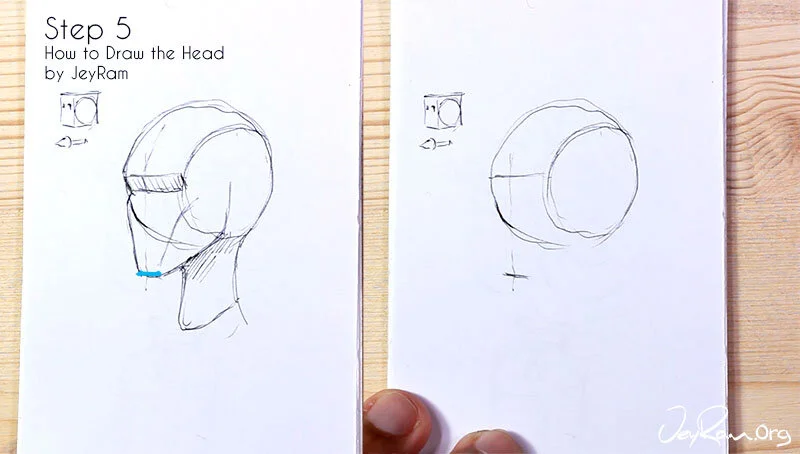
Step 5. Chin
Draw a small line where the chin will go, you can change the look of the face by drawing this line either further up or lower down. Typically cuter faces tend to a small jaw so the chin is further up & more aggressive faces tend to have a chin that falls lower.
Step 6. Ear Line
Returning to the circle we drew earlier, draw a line that begins the jaw and also defines where the ear will go. Use the diagram on the left to help you see the added line.
Step 7. Jaw
Connect the chin line and ear line and create the shape of the jaw. If you want a more masculine face make the jaw less round by bringing the ear line down so it creates more of a box-shaped jaw.
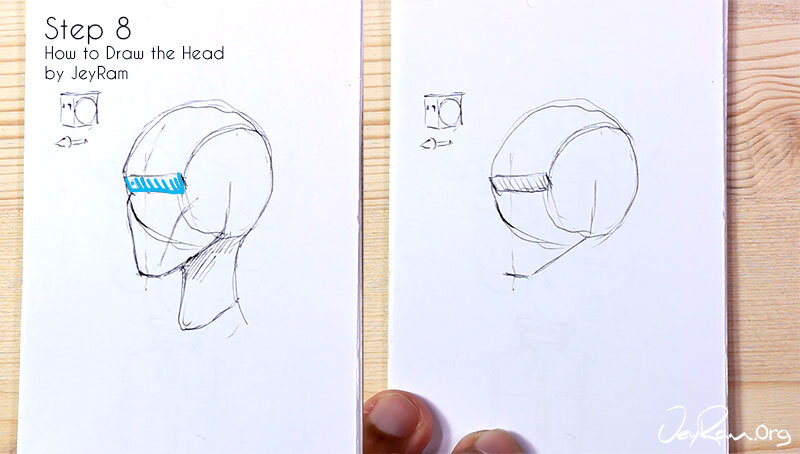
Step 8. Eye Sockets
Draw a line below the brow line that is sunken into the sphere, this region is where the eyes will go. When practicing the head shape I like to darken this area because under normal lighting conditions there are a lot of natural shadows here.
Step 9. Cheek
Connect the bottom line of the eye sockets with the chin to define the cheek on the far side.
Step 10. Second Cheek
Draw a curved line from the end of the chin up towards the circle we drew in step 2, this helps define the side plane of the face and also the cheek bone.
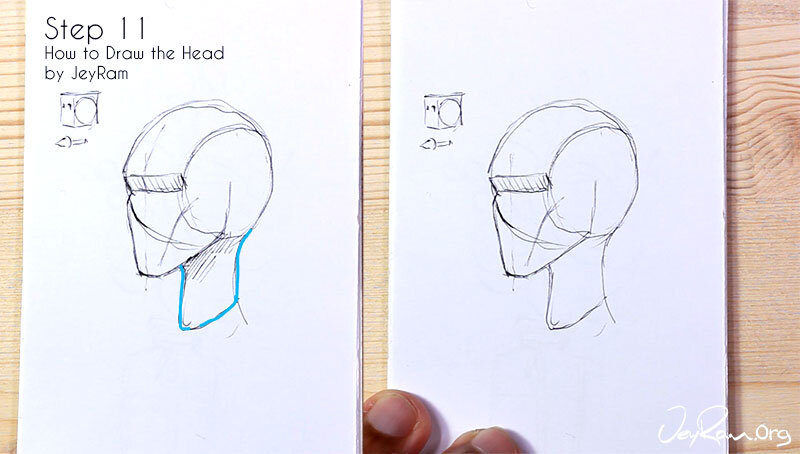
Step 11. Neck
Add a cylinder to the base of the neck, make sure to leave space underneath the chin and also some space at the back of the sphere. Next time you see a friend, pay attention to how the neck connects at the base of the head…just dont get caught staring :P
Step 12. Shading
Add some shading underneath the jaw so give the drawing some dimension
The drawing is complete! these are the basics steps for drawing the headshape and I hope this was useful to you. Make sure to grab the free worksheets and get some consistent practice in.
Learning how to draw is a skill that needs to be continuously sharpened, think of it as a kitchen knife that gets dull over time if not taken care of. Keeping a daily practice will help you grow even if it is just a little bit of practice everyday. Use references and also push yourself to draw from imagination, use a variety of angles to challenge your drawing ability.
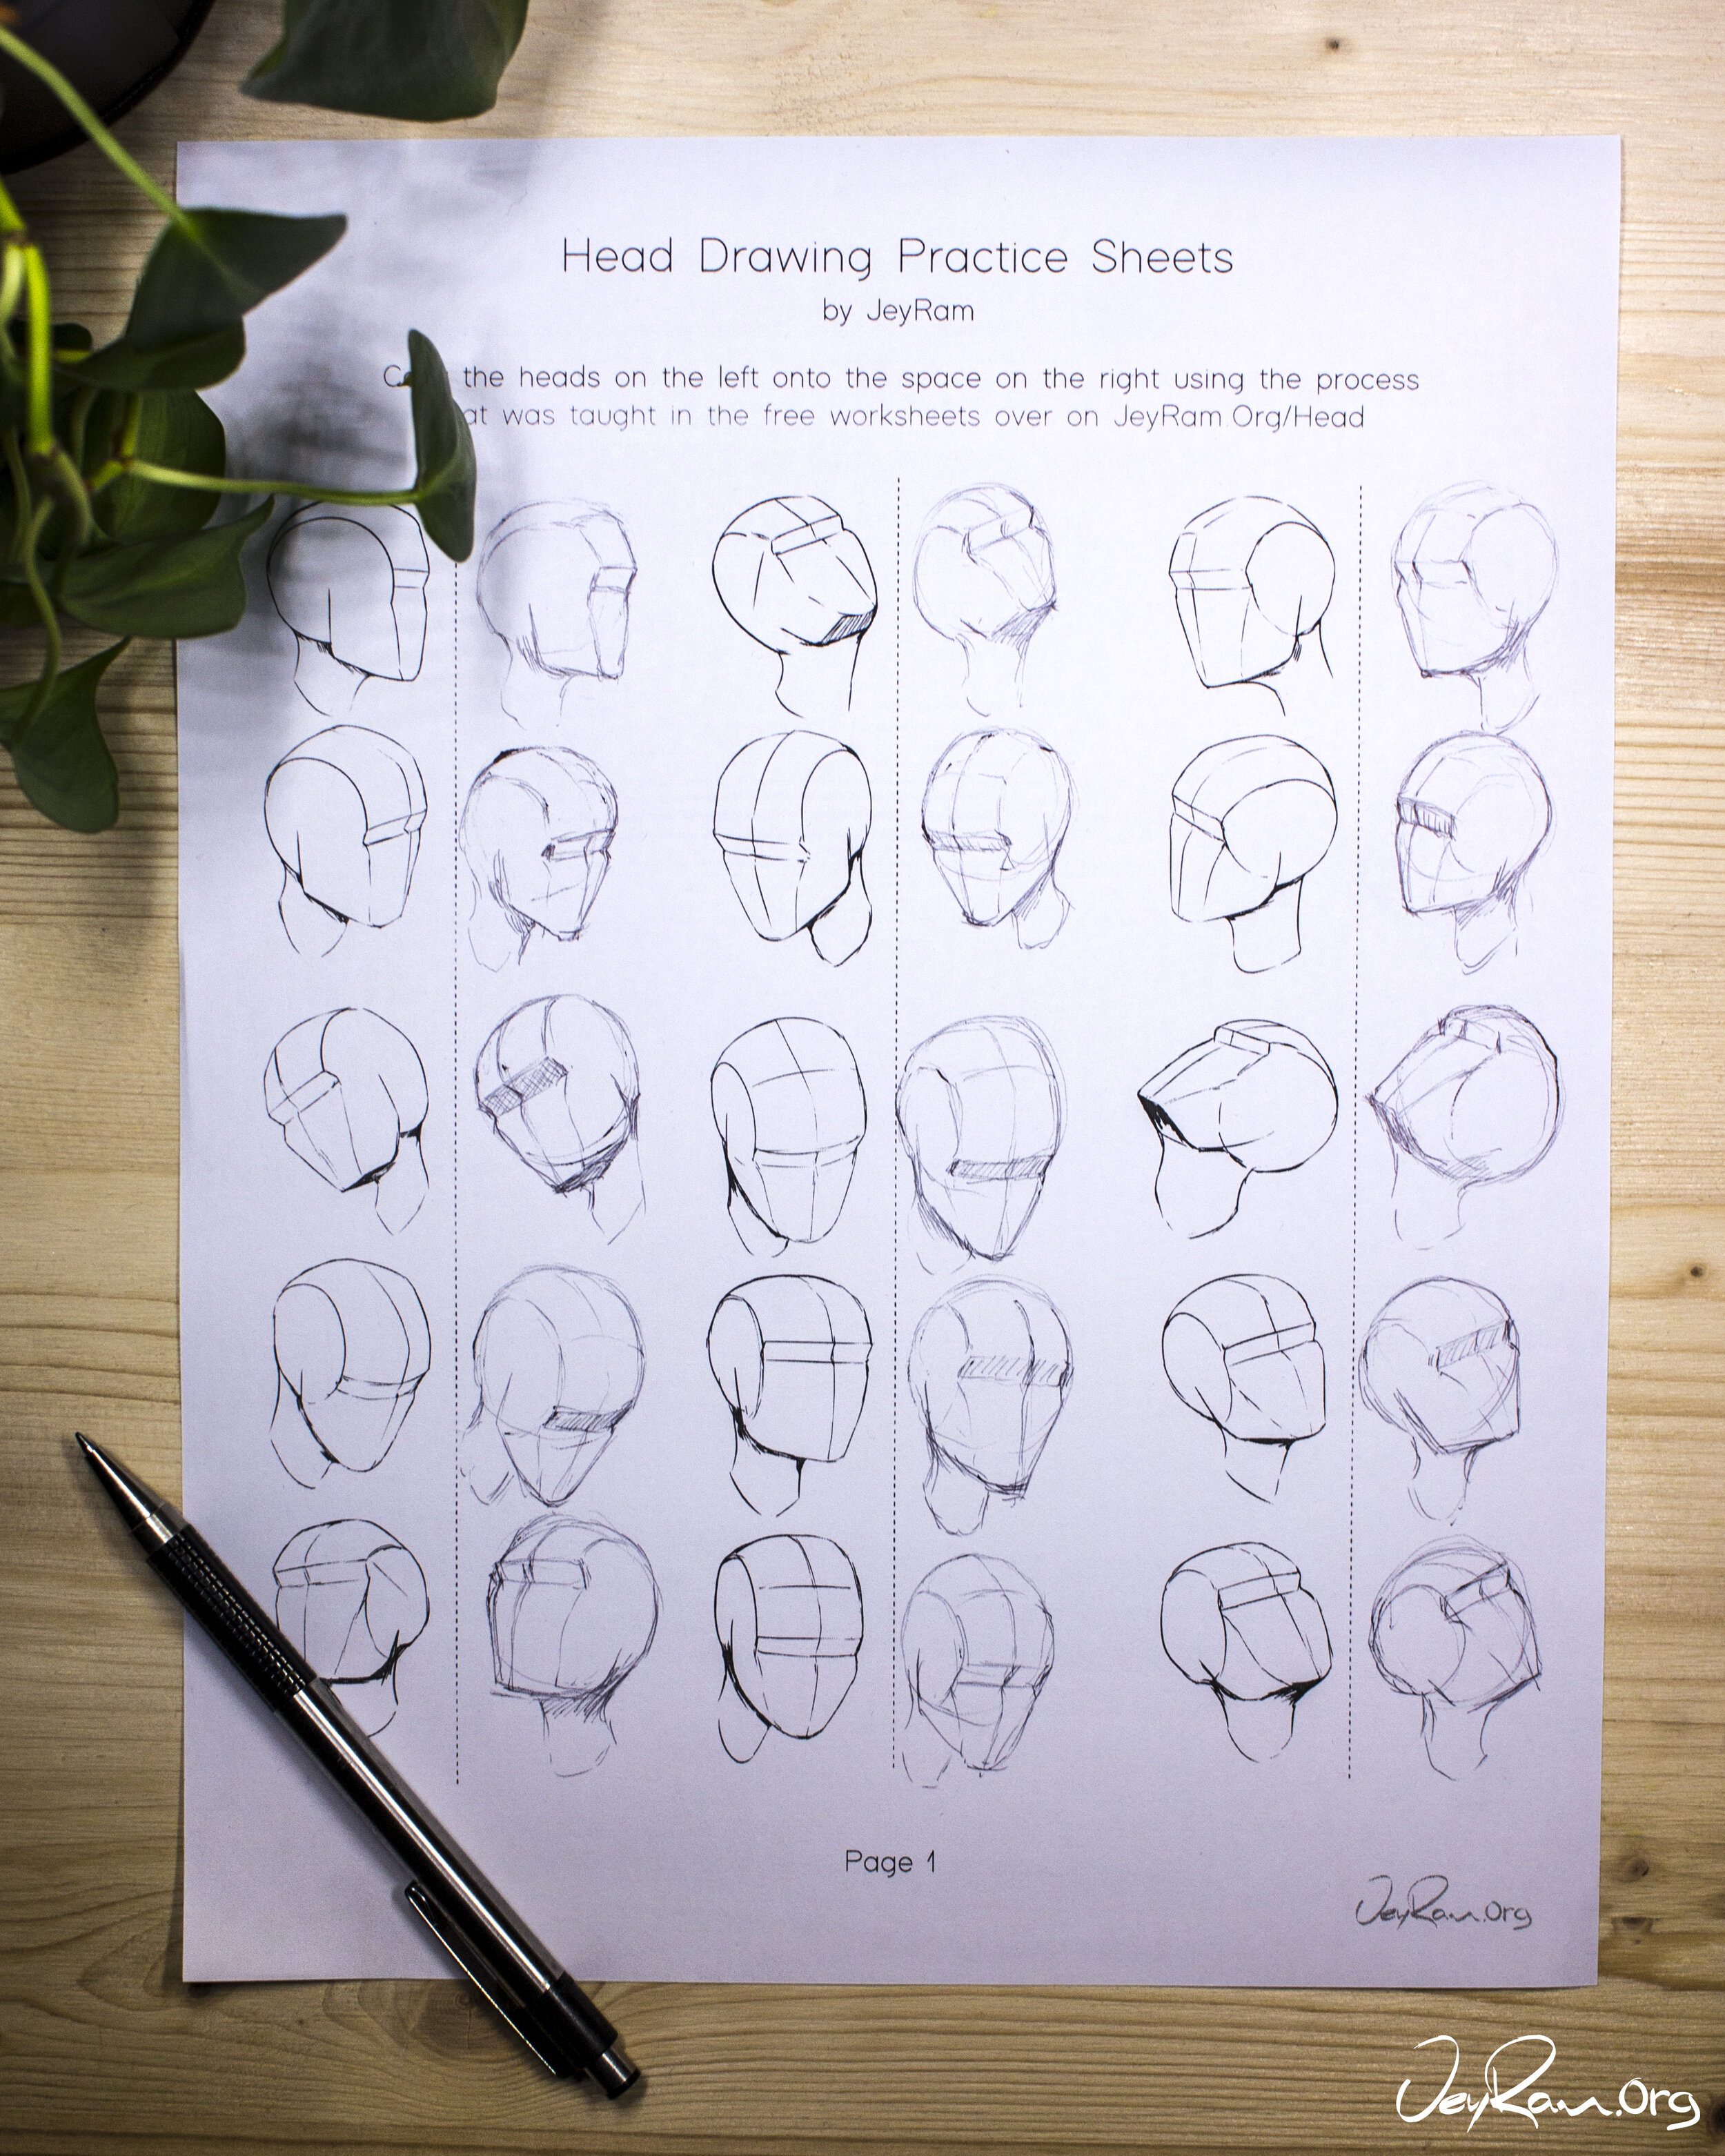
I made an 11 page worksheet of heads from different angles that I use to practice regularly, you can grab the PDF of it below if you have found that these worksheets are useful to you. I design these tutorials to help people actually develop the skills of drawing instead of just talking about theory. Learning a bunch of theory off video tutorials doesn’t actually help you learn how to draw.
I have spoken to many artists who cant name the specific parts of anatomy but still create gorgeous drawings because they have trained themselves to draw. Dont fall for the illusion that reading and watching tutorials is all it takes, its tempting because its easier but it wont help you in the end. I recommend only seeking out deeper knowledge once you are able to get the basic structures down and are comfortable with the most foundational skills.
I will be making more tutorials for all the features of the face and the rest of the anatomy, so stick around if you want more! :D
Quickly learn the basics of drawing faces and start having fun with this simple drawing course designed for beginners!
This Course Includes:
✓ Over 14+ hours of video content!
✓ 35 Video Lessons!
✓ 35 Printable Reference Sheets!
✓ Real time video with voice over!
Tips for Practicing Drawing
Here are some quick tips that will help you improve your drawing rapidly in a short period of time:
Practice Daily
Use a system of practice like the worksheets on this site or any other system you find useful such as drawing from photo reference 20mins per day
Review your own work: take a photo of your drawings using your phone and flip the image horizontally using editing software to see mistakes. This method can help you re-see the image because we tend to overlook mistakes due to our brains getting used to the drawing.
Take time to doodle and have fun, never get too caught up in improving at the cost of the enjoyment that comes with drawing.