
How to Blend with Ballpoint Pens
Shading and blending with ballpoint pens can seem like mysterious magic from the outside but it will be easy once you learn these simple techniques.
Hatching
Hatching is when you draw small lines that run parallel to each other to build up tone. The spacing of the lines will define the level of darkness of the hatching. You can see in the examples below how you can attain different levels of darkness.
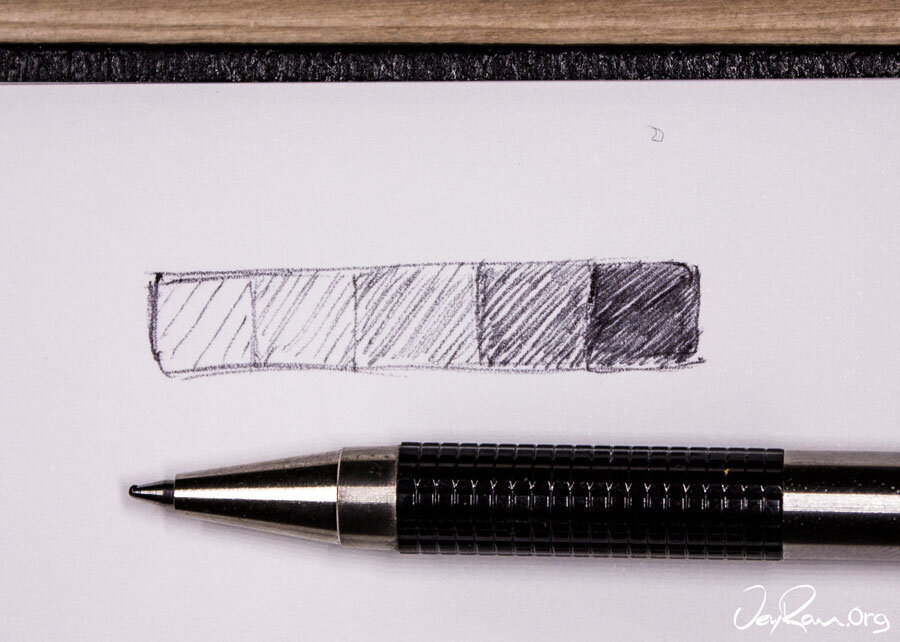
Try this out in your sketchbook! It can be quite relaxing and enjoyable to sit down and do some hatching. Make sure to take your time and get a feel for the spacing. Once you've gotten comfortable with putting down the lines, try to create smooth transitions between each of the tones.
Practicing on a shading scale like the one above is a great way to develop your ability to blend with ballpoint pens. You want to develop this skill until it becomes as natural as brushing your teeth, this way you won't have to spend plenty of mental power trying to get the lines right.
You can also play around with different sized ballpoint pens and see what you like. Some pens might feel more natural in your hand than others and since ballpoint pens are so cheap it doesn't hurt buy a few.
Crosshatching
To crosshatch, we do the same thing as hatching except we also use lines that dissect the initial lines. This is a very popular technique amongst comic book artists and is a great way to get smooth shading throughout a piece.
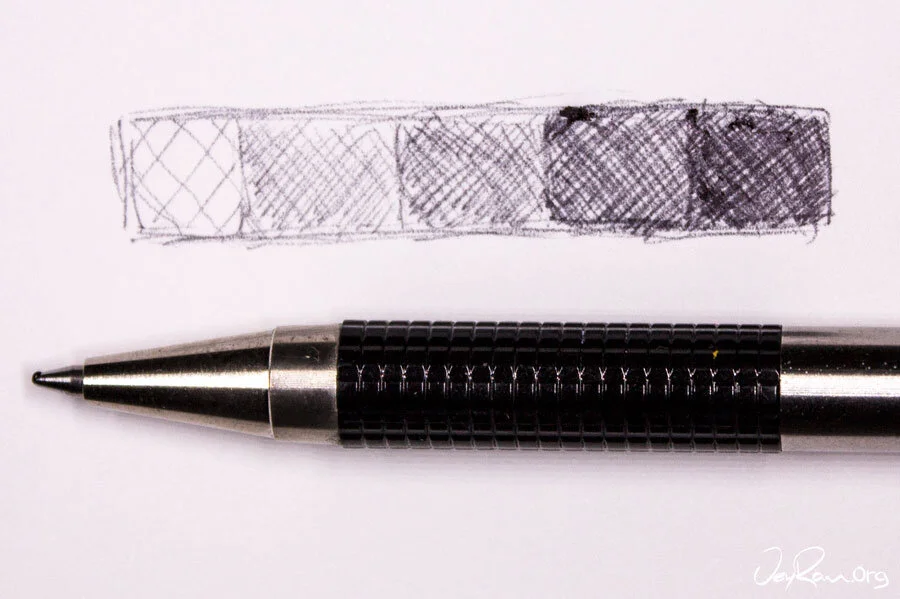
Copy the example above in your sketchbook and try it for yourself. Learning both methods of shading can really help you get smooth blending because you will have more skills in your toolkit.
It will also be useful if you take the time to look up your favorite ink artists and zoom into their images and see how they shade. Identify where they are layering the lines so smoothly that you don't even notice them. One artist, I recommend you check out is Franklin Booth, you can clearly see how he has used different densities of lines to build finished images (but do keep in mind that he used ink + claybord which captures slightly different result from ballpoint pens)
Contour Shading
To capture a realistic sense of a form we have to pay attention to how a form curves. As you can see in the drawing below, the hatching lines follow the curve of the doughnut. By learning how to shade with the flow of the form you will get a pleasant result.
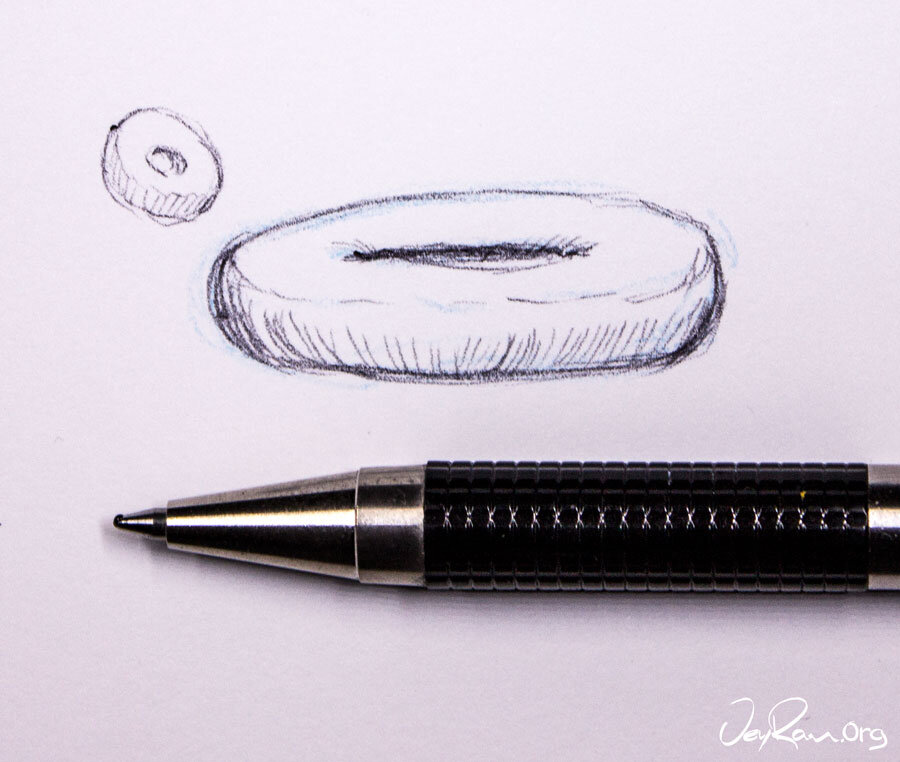
Use guidelines to help you define the form, imagine that water or honey is running down the surface of the object and ask yourself “how would this flow”. The direction of flow is the direction you should add shading in
Cross Contour shading
Now, let's add contour shading that goes in both directions. If you want to capture a lot of depth in your drawings this technique is great because of the overlap of lines will give you some deep darks
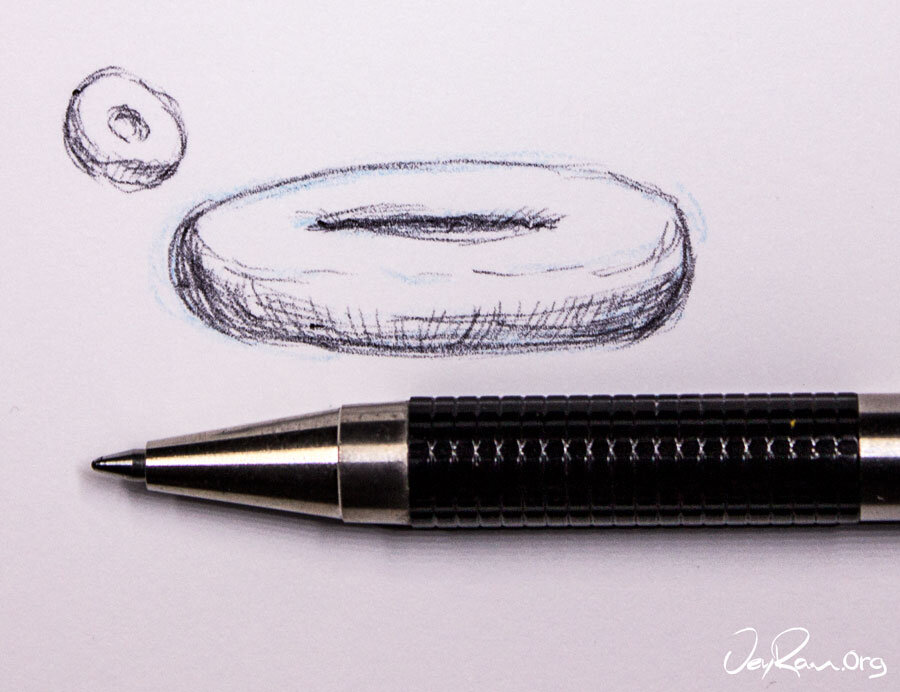
Pick a subject matter with a fairly basic form (like a doughnut) and try this out for yourself. Learning these methods with something simple at first will make it a lot easier for you to apply the knowledge to something more complex later.
Those are the main ways of blending and shading with ballpoint pens. It really comes down to building up lines that give a sense of tone. I course full of printable worksheets that you can check out here if you want to learn all the aspects of drawing realistically with a ballpoint pen. This tutorial is specifically designed with worksheets that actually help you develop your skills quickly and systematically. Its what I wish I had when I started
Some things to keep in mind when shading:
Work Larger
Its easier to get smooth shading if you work larger because there will be more room to get smooth transitions. If you zoom out of an image, each line gets thinner so they blur together more.
Think about how laser printers work, they put down super tiny dots that make up an image or text document, but because each dot is so small you don't notice them. The dots blur together to make an image and that is what we are trying to do when we lay down these lines.
Paper Choice
Your choice of paper can have a great impact on how your drawings turn out, try different papers and see what you enjoy. I personally love using slightly rougher papers for loose sketching and a more smooth paper for refined illustrations. Choosing watercolor paper might be a great choice for those who enjoy the texture.
Start Gently & Build-up
Shading and blending with ballpoint pens is challenging because it takes time to build up the tones. With paint, you can quickly put down brush strokes and blend between but with a pen, you want to be gentle. Building up the shading slowly can help you keep your darks and lights balanced and makes it easier to make sure that the focal point has the highest point of contrast.
Textures
Once you have mastered these shading techniques, try shading different textures. Look up black and white photos of the texture or subject you want and see how you can capture their essence with ink. Building up your understanding of different textures can make your images stand out.
I wrote an article of 16 Tips for Drawing with Ballpoint Pens that cover more advice on pen drawings. It covers all the things I wish I knew when I started this journey and can save you plenty of time!
